| I pondered on this topic for quite some time as to
whether it would be useful to people in and outside the vintage
drum community. Some of it is my own personal technique and other
information I found on drum forums. I offer this information for
the person that has never done this before or for the seasoned
drum cleaner to maybe pick up some new tips. Also, many restorers
use proprietary methods that they normally do not share, so there
are many more methods and techniques not in this article that
work just as good! Hopefully it will save another drum from steel
wool! |
Always start by taking pictures of the project so you can document
the change when it is done!
Step 1: Find the project snare
drum
a. Metal Shell (COS, COB, Copper, Nickel, Aluminum Etc..)
b. Wood Shell Stained
c. Wood Shell Wrapped
d. Wood Shell Painted
e. Vistalite Shells (Acrylic)
Step 2: Disassemble the drum
Supplies:
Plastic bags or plastic containers with lids
Sharpie marker to label the bags or containers
Phillips and Regular screw drivers (I prefer different sizes)
Small socket set (do not use Vice Grips, Crescent
Wrenches, Robo-Grips or anything that can hurt the nut when it is
removed)
|
|
 |
 |
a. Take a photo if you can. Either digital or film to document
the drum and the project in case you need to reference the picture
later to see how something was mounted.
b. Remove the tension rods from the top and bottom heads and put
them in a plastic bag and label them
c. Remove the lug casing screws and and put them in a bag and
label them.
d. Personally I like to work on a piece of carpet scrap on a work
bench so I line up the lug casings with all of the internal parts.
spring, internal felt, lug screw inserts etc... Normally I do
not bag the lug casings so they do not scratch against each other.
e. Remove the tone control and bag it as well as the strainer
and butt. That is a good time to take notes on how the washers
are in reference to the inside and outside of the snare. |
Step 3: Begin Cleaning the parts based
on condition
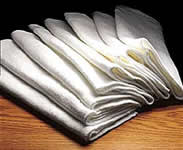
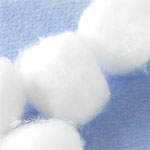
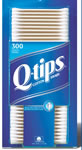
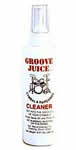
Supplies: Standard Cleaning
Soft cloths
Cotton Balls
Q-tips
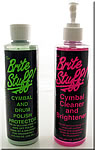
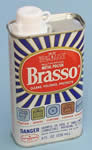
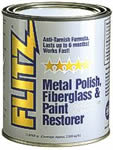
Metal Polish (Flitz, Groove
Juice, Brasso, Brite Stuff Cymbal and Drum Polish or your favorite
metal polish) -- Used to polish all of the
metal parts
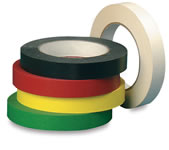
Masking Tape -- Used to tape the inside of
any holes on a shell to protect the wood
Fine Steel Wool (DO NOT USE ON CHROME
PARTS) -- Great for tension
rods and tension rod inserts
Lubricant (Petroleum Jelly, Clear Lubricant, etc..) -- Lubricate
the tension rods, strainer and all of the screws
Supplies: Pitting, Rust, Grunge
Same as above
Wink --
Removes Rust
Bon-Ami
+ Dawn
Dishwashing Soap -- Removes grunge,
dirt, rust, or grease. Just get a bowl or plastic container and
mix a little of both and put the parts in. You can add just a
little water to make it thinner, then with the tooth brush or
sponge clean the parts.
WD40 -- Removes Rust and cleans parts.
Not a lubricant like a silocone spray.
Plastic or glass bowls containers -- These
are for holding parts when they are being cleaned
Scouring Pads, Sponge or Toothbrush -- Great
for the dirty work and getting into the grooves on screws |
| You may not use all of the products above, but they are examples
of items that work. Please do not experiment by mixing cleaners
since this may cause adverse reactions. No need to pass out while
cleaning a drum! |
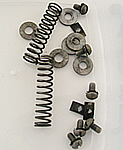
Standard Cleaning:
Here is a picture of the parts*
listed below.
Click on the image for a larger version. |
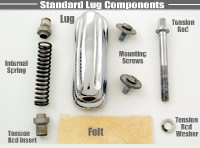 |
*Other people may
use different names for these parts
Lug Casings:
I start with the lugs. I take one lug and remove the interior
parts and place them on the work surface. I take a Q-Tip dip it
in the metal polish and work it all over the lug and set it down
and repeat the step on 3 or 4 lugs. I have a first buff and second
buff cotton towel. I give the part the first buff which takes
off the majority of metal polish then I follow up with the cleaner
towel and give it a final rub taking my time and making sure it
is all shiny. During this process I never touch the part with
my hands. It is always handled in the towel. I place it back in
line with the internal parts. |
Internal Felt:
I usually leave it alone, if the lug does not have internal felt
then you can pack it with a cotton ball (if that's all you have)
or go get some heavy felt at the fabric store. Cut it in little
rectangles so that it wraps around the spring |
Tension Rods:
Tension rods can be in a variety of conditions so it really depends
on how bad they are. If it is a basic cleaning then a good soak
in the dish soap and cleaning with a tooth brush will do the trick.
I then follow up with a little metal polish. If they are rusted
then you can use a more advanced method of cleaning which is used
by a variety of professionals. I also gave a modified version
if you do not have the equipment. For this you will need a bench
vise, a drill with a drum key bit on the end and some steel wool.
Take the drum key and wrap it with the steel wool then clamp it
in the vise so it is snug, but not too tight. Then take the drill
and run it in forward and reverse a few times or until the rust
is off the tension rod. I also add a little metal polish to the
lug before I begin. If you do not have all of that then the same
thing can be done a little more labor intensive with a pair of
vise grips, steel wool and a regular drum key. Just put the tension
rod in the steel wool (with a little metal polish on it) and clamp
it gently into the vise grips then turn the key in and out until
the rust is gone. This method takes longer but is quiter and requires
less equipment. |
Spring:
Since this is a standard cleaning the spring should already be
pretty good and I personally just leave it alone. |
Lug Insert:
A lot of times these have improper lubricant and it is black or
brown or just covered in grease so I take the steel wool and pull
it apart and make it pencil like and fit it in the lug insert
and screw it into the steel wool. this really cleans out the threads.
If the exterior of the lug insert is dirty I use the metal polish
and clean it up. |
 |
Rims:
Since these are in decent shape on a standard cleaning then I
just go ahead and apply the metal polish to the inside and outside
of the rim. With a towel in each hand I work the rim around a
few times. I then follow up with another towel to really give
them a good shine. I use Flitz for all of my chrome work. The
only cleaner I do not use is Brasso, but if you have it in the
house then give it a test and see how it works. |
|
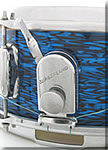
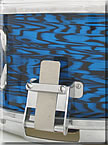
Strainer and Butt assembly:
If the strainer can be taken apart then I do. This way I can clean
the slide section that the strainer requires to move up and down.
I also polish this and then apply a small amount of lubricant
to keep it moving smooth and worry free. |
 |
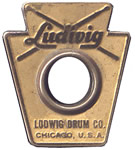
Badge:
This is a standard Ludwig Keystone Badge and personally when I
work on a badge I take extra time in cleaning it. In some cases
they are painted. I would use wax instead of metal polish to clean
it. If the badge is totally destroyed or bent then I would likely
find a replacement if I wanted the drum to be as perfect as possible.
I have seen other discussions on this topic and if you really
have to remove it then you can visit my section on "How
to Re-Wrap a Drum" and learn 4 types of badge removal
techniques. |
 |
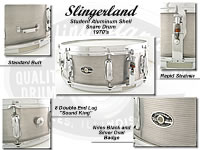 |
For a complete image
of all of these components on a 1970's Slingerland Snare drum
click the graphic on the left |

|
Shell: Metal
If it is a metal shell I will also polish it with the metal
cleaner. Normally if the interior is fine then I just leave
it alone. In many cases the interior has an ink stamp, paper
tag or other identification mark, so you have to be careful
not to damage these very important identification marks.
|
 |
|
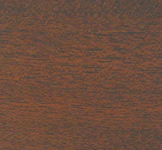
Shell:
Stain
If the shell has exterior stain then I will use Scott's
Polish to give it a nice shine and protect the wood. If the
interior is natural I will also use it on the inside of the
shell as long as I do not affect any ink stamps or identification
marks from the manufacturer. It is important also that you spray
it on the rag and not all over the shell. You could use any
household polish or professional grade protector you choose,
but just be sure it is not oily and dries without leaving a
residue on the drum. |
 |
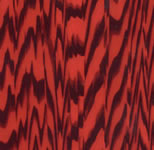
Onyx or Agate Finish |
Satin or Satin Flame |
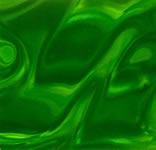
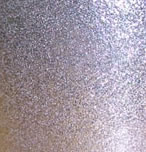
Sparkle |
Pearl Finish |
|
|
|
|
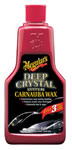
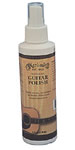
Shell
Wrap:
If the wrap is in good shape then I would probably get a high
quality car wax, guitar
polish or similar product and give the shell a nice protective
coating.
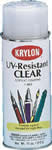
In some cases if you have the experience level the shell can
be wet sanded with 1500 to 2000 grit sandpaper. This would require
that the interior holes be taped with masking tape and you take
a great deal of time to get it even and you don't sand to much
into the finish. Then a clear coat (Krylon
Products) can be sprayed on to give it a really nice shine
and bring the wrap color back. I have never tried this technique,
but will be very shortly on a wrap that has scratches and hazing
on the shell from the previous owner. I was also told to use
the Gloss Clear Coat.
*I would not try this method with a rare
finish or a satin flame* |
Special note for WMP (White Marine Pearl)
Many people ask if they can bring back the original WMP color
of their drums. I would say NO. You will never get back to the
original color, but there is a technique used by experienced drum
restorers that will take off some of the yellow and get them close
to the original and looking much better then it originally did. |
Shell Painted:
If the shell has no scratches then I will wax it with any high
grade car polish or guitar polish. On the other hand if the shell
has small scratches or surface scratches then a high quality non-abrasive
buffing compound can be used before you polish. I usually test
it under a lug to see how it is going to work. In some cases I
do the buffing twice and the waxing twice to really get it shining
nice. |
 |
 |
Shell: Vistalite
(This is after the hardware is
removed)
With the bare shell you you can take a mild dish soap and a
soft sponge or cotton towel and clean the shell. Remove everything,
because any small particulates can scratch the shell in the
buffing and waxing process.
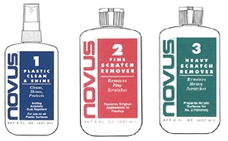
Novus 1. General cleaning and buffing
Novus 2. Light Scuffing
Novus 3. Heavy Scuffing (Follow up with Novus 2)
Scratches will require a completely different method and will
not be discussed in detail. It will require wet sanding and
very fine sandpaper.
|
 |
Rust:
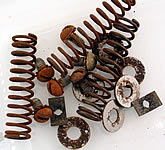 |
Here
is a group of rusted parts from a 50's Gretsch Snare Drum. It
is not uncommon to find a drum that is completely free of rust
except the internal parts. This is the second drum I found like
this. The picture on the right are the same parts after the
Whink treatment. |
 |
Rust is another big topic among drum restorers and requires
some special attention. Once rust is on an object more then
likely the metal underneath has been eaten away. So if you remove
the rust you will probably have bare metal. In a lot of cases
the item may have surface rust, which means it has not officially
attacked the metal underneath and can be removed without hurting
the part. Steel wool was the common method, but in many cases,
depending on the quality of the chrome will hurt it and create
little scratches in the metal. I recently started using a product
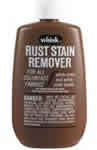
called Whink rust remover.
This is in a little brown bottle and can be purchased at most
grocery stores or large superstores like Wal Mart. The product
requires special attention protecting your hands and making
sure it is used correctly. The parts I used it on were clearly
rusted and after sitting in the Wink the rust was gone. It was
surface rust and the metal underneath was pretty much intact.
(Only to be used on screws and
other non-chrome parts)
Using metal polish will also remove surface rust and requires
a certain level of elbow grease and special attention to remove
it. Like anything, if you take your time it should come out
just great.
If the rust has really taken hold then more aggressive methods
are required and this in turn will take all of the exterior
metal off as well. At that point it will need new metal and
will have to professionally be prepared for a new metal surface
to be added. The metal shop will probably dip it in acid and
that will remove everything and get it ready for re-plating
of the metal of choice.
This is expensive, so make sure you know what the cost is up
front. I have heard of collectors plating in Gold on snares
that were originally Gold to bring them back to original condition. |